Mini excavators are indispensable tools in construction, landscaping, and various other industries. Among the attachments that enhance their functionality, the ripper stands out for its ability to break through tough soil and rock. However, like any piece of machinery, a ripper requires regular maintenance to ensure optimal performance and longevity. This article delves into effective strategies for maintaining your mini excavator ripper, providing valuable insights and practical tips.
Understanding the Mini Excavator Ripper
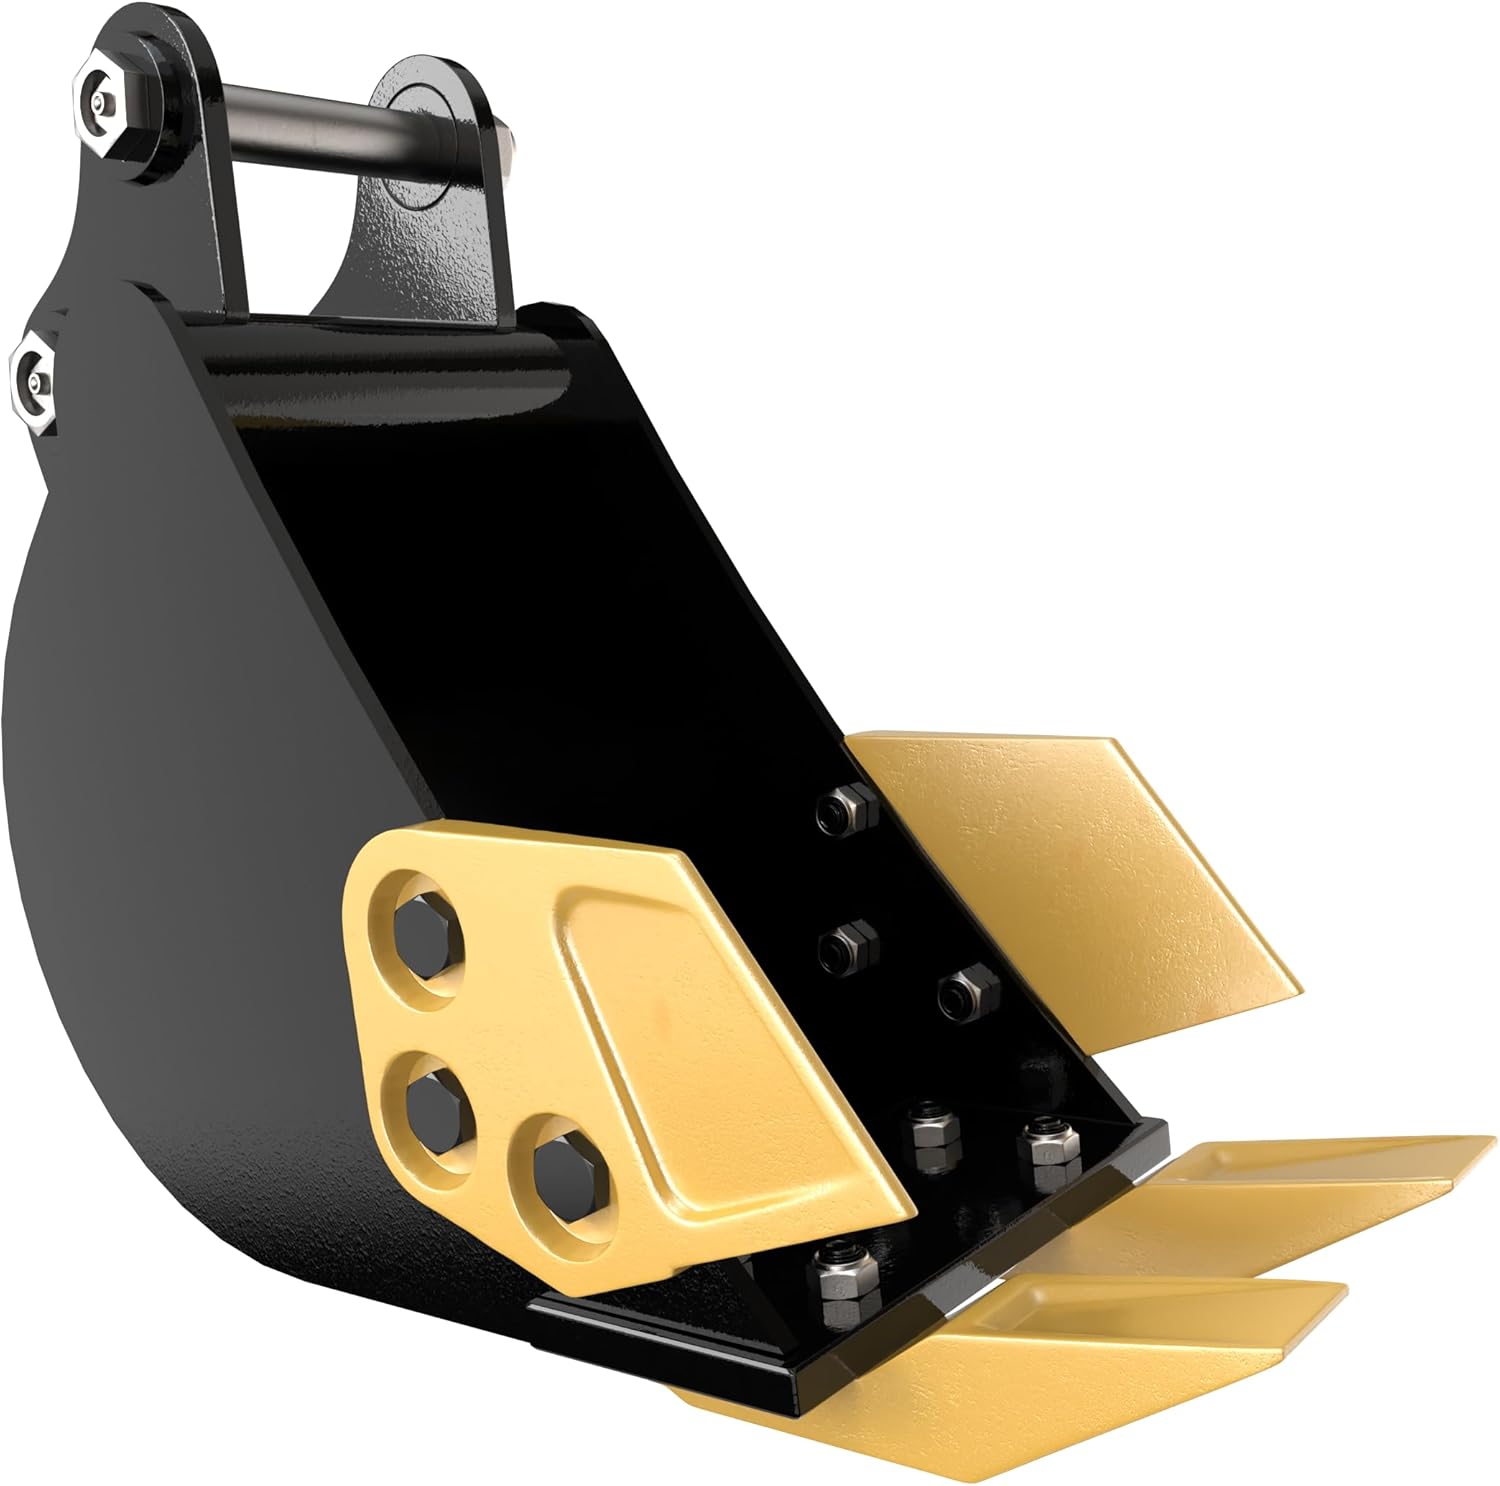
A ripper is a specialized attachment for mini excavators designed for breaking up hard ground, digging trenches, or removing tree roots. It typically consists of a robust steel shank with a pointed tip that penetrates the earth, allowing the operator to perform tasks more efficiently. Understanding its components and how they work can lead to better maintenance practices.
Components of a Mini Excavator Ripper
- Shank: The main body of the ripper, designed to withstand high stress and impact.
- Tip: The pointed part of the ripper that engages with the ground. It is often replaceable and subject to wear.
- Mounting Plate: Connects the ripper to the excavator’s arm, ensuring stability during operation.
Importance of Regular Maintenance
Regular maintenance of your mini excavator ripper is critical for several reasons:
- Performance: A well-maintained ripper operates more efficiently, improving productivity on the job site.
- Longevity: Regular checks and replacements can extend the lifespan of the ripper, saving replacement costs.
- Safety: Proper maintenance reduces the risk of failure during operation, preventing accidents and injuries.
Key Maintenance Practices for Your Mini Excavator Ripper
To keep your mini excavator ripper in top shape, consider the following maintenance practices:
1. Regular Inspections

Conducting regular inspections is the first step in maintaining your ripper. Here are some aspects to focus on:
- Visual Checks: Look for signs of wear, cracks, or damage on the shank and tip.
- Mounting Integrity: Ensure the mounting plate is secure and free of excessive wear or damage.
- Joints and Pins: Inspect the joints and pins for proper lubrication and wear.
2. Cleaning the Ripper
After each use, it’s essential to clean the ripper to remove dirt, debris, and other contaminants. Here are some tips:
- Use a Wire Brush: A wire brush can help remove stubborn dirt and debris from the shank and tip.
- Wash with Water: Use a pressure washer or hose to clean the ripper thoroughly after heavy use.
- Inspect for Damage: Cleaning provides an opportunity to inspect for damage that might not be visible otherwise.
3. Lubrication
Proper lubrication is essential for the longevity of your ripper. Consider the following:
- Grease Points: Identify all grease points and apply grease according to the manufacturer’s recommendations.
- Frequency: Lubricate the ripper every 10-15 hours of use, or as specified in the owner’s manual.
- Quality Grease: Use high-quality grease that can withstand high pressure and temperature.
4. Tip Maintenance and Replacement

The tip of the ripper is the most vulnerable part and requires special attention:
- Inspect Regularly: Check the tip for wear and tear, and replace it if it shows significant damage.
- Use Replacement Tips: Purchase manufacturer-recommended replacement tips to ensure compatibility and performance.
- Welding and Repairs: If the tip is chipped or damaged, it might be repairable through welding, but consult a professional.
5. Storage Practices

How you store your ripper can also affect its longevity:
- Store Indoors: Whenever possible, store the ripper indoors to protect it from weather elements.
- Keep It Elevated: Store the ripper off the ground to prevent rust and corrosion from moisture.
- Protective Coating: Consider applying a protective coating to prevent rust and corrosion, especially in humid environments.
Real-World Case Studies

To illustrate the importance of maintenance and the impact it can have, consider the following case studies:
Case Study 1: Construction Firm A
Construction Firm A regularly maintained their mini excavator ripper through systematic inspections and timely replacements. As a result, they reported a 30% increase in productivity due to fewer breakdowns and enhanced performance. The firm saved approximately $15,000 in repair costs over a year, demonstrating that maintenance pays off.
Case Study 2: Landscaping Company B

Landscaping Company B neglected to maintain their ripper, leading to frequent failures and costly delays. After incurring over $5,000 in emergency repairs, they implemented a maintenance schedule. Within months, their operational efficiency improved significantly, reducing downtime and costs associated with repairs.
Statistics Supporting Maintenance Practices

Research shows that regular maintenance can lead to substantial savings and efficiency improvements:
- According to the U.S. Department of Energy: Regular maintenance can improve equipment life by up to 30%.
- A study by the Equipment Leasing and Rental Association: Companies that adhere to regular maintenance schedules report 25% less downtime.
Maintaining your mini excavator ripper is crucial for ensuring its optimal performance, longevity, and safety. By conducting regular inspections, cleaning the attachment, lubricating moving parts, paying special attention to the tip, and storing it properly, you can avoid costly repairs and enhance productivity. The case studies and statistics presented reinforce the importance of a proactive maintenance approach. By investing time and resources into maintaining your ripper, you not only protect your equipment but also ensure the success of your operations.
In summary, remember that a well-maintained ripper not only performs better but also serves as a reliable partner in your construction or landscaping projects. Prioritize maintenance to reap the benefits of efficiency, safety, and cost savings in the long run.